Posted in Greek Recipes

Grilled Chicken Souvlaki with Yogurt Sauce

And my love for Greek food continues… 🙂 This Chicken Souvlaki recipe is fun to make, easy to do and satisfying to eat! Grilled chicken tenders marinated in garlic, lime juice, spices and herbs partnered with a fresh yogurt sauce – try something different than your usual dishes at home and surprise your loved ones with this winner recipe!

yields 10 sticks / serving 5 persons

Cook Time 15 mins

Prep Time 20 mins

What you will need:

For the CHICKEN SKEWERS:

  • 4 pieces Chicken breast fillet cut into cubes
  • 4 tbsp olive oil
  • 4 garlic cloves (grated or minced)
  • 3 tbsp lemon juice
  • 2 tbsp dried oregano
  • 2 tsp rock salt/kosher salt
  • 1 tsp black pepper
  • bamboo skewers (to be used later)

Combine all these ingredients in a bowl, mix well and put in the chicken cubes. Leave in the fridge to marinate for 30-40 minutes. You can add more olive oil as desired to help evenly grill the chicken later.

Prepare the yogurt sauce whilst chicken is still marinating

For the Yogurt Dip:

  • 1.5 cups greek yogurt
  • half cup finely minced cucumber (make sure not to include the seeds!)
  • 1 clove grated garlic
  • 1 tbsp lemon juice
  • minced parsley or dill (whichever you prefer)
  • salt (to taste)
  • pepper (to taste)

In a small bowl, combine greek yogurt, grated garlic, lemon juice, minced cucumber and roughly mix. Add salt and pepper to taste. Sprinkle with parsley and place in the fridge to set aside. (how easy was that!?)

Preparing to Grill:

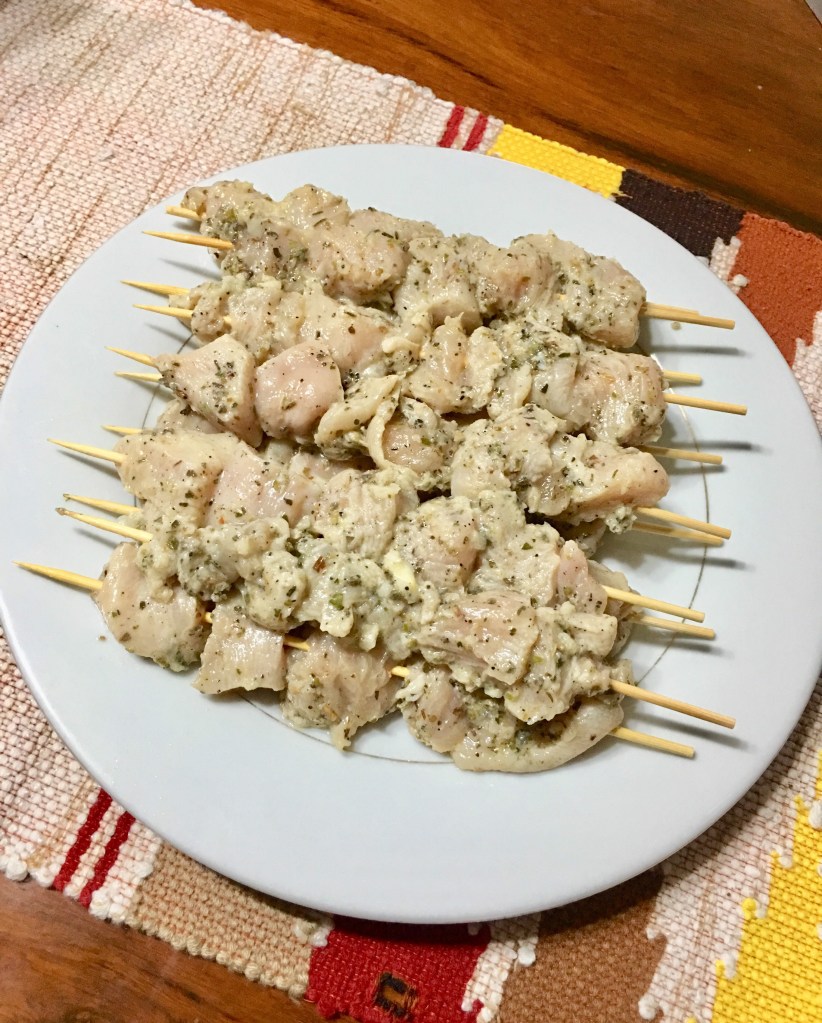
Get your marinated chicken out of the fridge (after 40 mins~) and thread chicken cubes onto skewers. Whilst you’re on it, start heating your grill or grill pan.

Properly place skewers on the grill, best to do this in 2 batches (if let’s say you have 10 sticks). Let it cook on each side for 5 minutes or so until you achieve that tender smoky chicken perfection – do not overcook as this will dry out your chicken

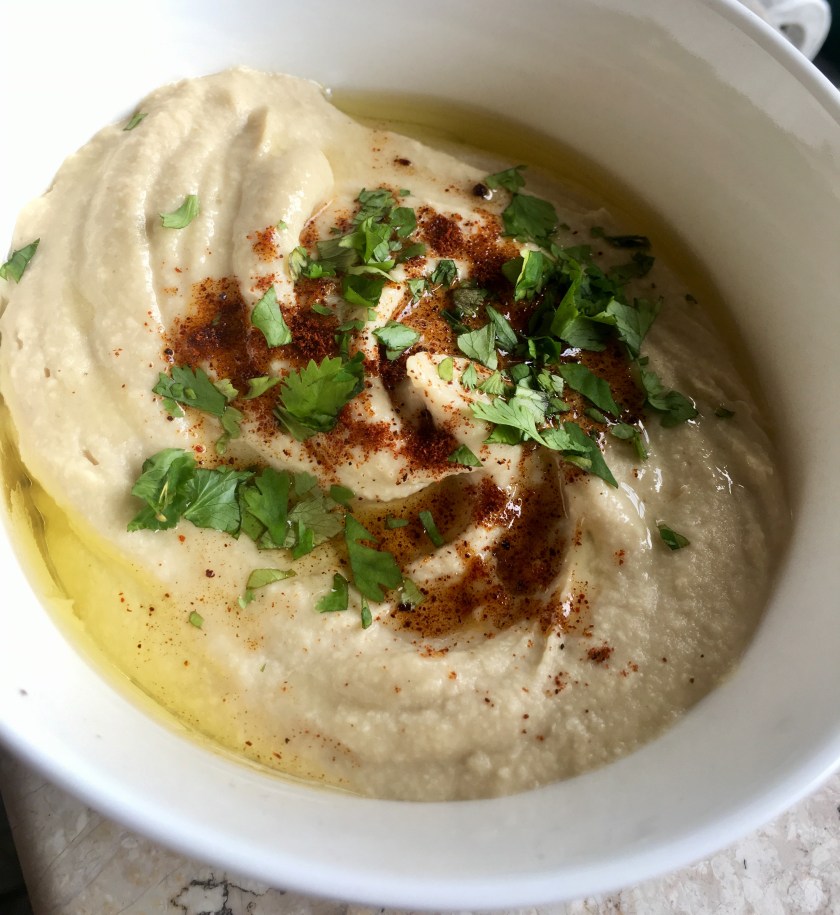
Grab the yogurt sauce your prepared, arrange it with your hot off the grill chicken skewers and serve with pita bread OR hummus OR rice (because I’m Pinoy like that – rice is rice!) and ENJOY!

Posted in Mediterranean Recipes

Nutty, Tangy, Lemony HUMMUS Recipe

I couldn’t be prouder of my Hummus Recipe just because it tastes so legit! even better than what I’ve had in restos, quite frankly. It’s smooth, creamy, fluffy and just satisfying!

I absolutely love Mediterranean cuisine hence my go-to restaurant if the husband and I get into the never ending back and forth question, “So where do you want to eat?” is CYMA Greek Taverna. Everything in their menu is just bursting with flavor.

HUMMUS makes a wonderful snack or appetizer served with warm, chewy pita bread and fresh grilled veggies. Just perfect to dig in any time of the day!

Yield 3-4 cups

Prep Time 20 mins

Cook Time 30 mins

Ingredients:

  • 2 cans chickpeas (so you can set aside for movie night! or just for whenever you crave for it)
  • lemon juice from 3-4 pieces of lemon
  • 3-4 cloves garlic (grated is best)
  • 3-4 tbsp EVOO (extra virgin olive oil – ha! you learned that from me!)
  • 2 teaspoons baking soda (if you’re using chickpeas in a can)
  • salt to taste
  • 2-3 tsp cumin
  • paprika (for garnish)
  • finely chopped parsley (for garnish)
  • TAHINI (quick recipe below)
  • Pita Pockets (I bought mine from Village Gourmet)

Quick & Easy TAHINI Recipe: Toast 3/4 cup hulled sesame seeds (these are the lighter colored sesame seeds) in a pan sans oil. When it turns light brown, take them out of the pan and let it cool for 5 minutes or so. In a blender, throw in the toasted sesame seeds, blend until it turns soft and crumbly. Add 2-3 tbsp of olive oil until you get that consistency you want. Sprinkle with salt to taste and give it one last run on the blender. DONE! 🙂

Let’s make Hummus:

  1. Place chickpeas in a pan well enough to cover them with water. Add baking soda and bring it to a boil (about 20-25 minutes). Remove them from the heat when you see the skin is peeling off and bloated-looking. Drain them in a strainer and run cool water. Set aside.
  2. In a blender, mix together lemon juice, grated garlic and salt. Let it sit for a few minutes. Next, add in the tahini and cumin. Mix well until soft and creamy. Give it a taste to see if it needs more salt or if you want a bit more garlic in there.
  3. If your mixture gets too thick, add a few tablespoons of olive oil or water to balance the consistency.
  4. Lastly, add in the chickpeas in your blender. Run it a several times until you reach the smooth and creamy texture of that perfect Hummus. (you can always add a bit more of olive oil or water to smoothen the texture as appropriate)
  5. Prepare your Pita Pockets (quickly warm them in a pan). Place just the right amount of Hummus dip in a bowl, drizzle with a little bit of cumin (optional) and paprika then sprinkle with finely chopped parsley. Voi-la!
Smooth and Creamy Hummus made like a pro!

Posted in Asian Recipes, Pinoy Recipes

Crunchy Lumpiang Shanghai (Spring Rolls)

This is one of my 4-year old son’s favorite food! He loves Jollibee Lumpiang Shanghai so much that we literally buy it everyday after school for his lunch. I just had to make a healthier version since he loves it too much he can actually eat it everyday! 😉

Prep Time 20 minutes

Cook Time 10 minutes

Yield 35-40 pieces

What you need for the filling:

  • half kilo lean ground pork ( I used Australian 90% ground pork)
  • 150 grams shrimp (optional but recommended)
  • 2 carrots (finely diced)
  • 2 medium white onions (finely minced)
  • 1 stalk celery (finely diced)
  • half cup minced parsley
  • 1 1/2 tsp salt
  • 1 tsp ground black pepper
  • 1 tsp all purpose seasoning/garlic powder (optional for more flavor)
  • 2 tbsp brown sugar
  • 1 egg
  • 1/3 cup water
  • 1 1/2 tbsp all purpose flour

Other Ingredients:

  • Lumpia wrapper (I used Bambi Spring Roll Wrapper 35 pcs)
  • approx 3 cups of cooking oil (best to deep fry to get the right crispiness!)

How to make lumpia:

  1. Put all the filling ingredients in a large bowl and mix very well
  2. Get enough amount of lumpia mix about 1 spoon scoop and wrap ( I used egg white as glue for wrapper ends when rolling – this works really well)
  3. Heat oil. carefully place the spring rolls before it gets too hot. This way the meat inside gets thoroughly cooked without burning the wrappers
  4. Serve with sweet and sour sauce or mayo or ketchup! whichever dip you like 🙂

You can set aside the rest of the uncooked lumpia to keep in the fridge and cook the next day or 2 for baon or appetizer. Here’s what I did to the rest of the lumpia:

Posted in Pinoy Recipes

Pinoy Pork SISIG

It’s cheat day weekend!(or any day really) This is a shortcut version to making the famous sisig using Monterey Ready To Cook Frozen Pack. Below are the ingredients I used:

What to add to make it yummier 🙂

  • pepper (to taste)
  • salt (to taste)
  • 1 tbsp chicken liver spread
  • 2 tbsp soy sauce (or liquid seasoning for a more elevated flavor!)
  • 2 red onions (finely minced)
  • 1 piece finger chili pepper (sliced)
  • 2-3 pieces calamansi (Philippine lime)
  • 1 egg (optional)

Let’s get cooking!

  1. From the freezer, allow the sisig to thaw out completely, best if you leave it in the fridge to preserve the flavor
  2. No need to use oil as the fats of the pork will be used to cook itself. Get your pan hot and transfer over all the contents of Monterey Sisig
  3. Add salt and pepper to taste and also add half of your minced red onions as this will work up the flavor
  4. Cook it well for 10 minutes until the color becomes darker or until you notice that its starting to look chewy and crunchy! (oh yeah!)
  5. Add in the liver spread and soy sauce/liquid seasoning . Throw in the minced red onions and give it a good mix. Cook it for another 5 minutes or so.
  6. Serve in a fancy sizzling plate or small skillet and add in the green pepper slices for some heat. Squeeze calamansi extract all over and if you like, top it with egg.
  7. Partner with some iced cold beer, Netflix and enjoy! #YOLO
Posted in Asian Recipes

Honey Chicken with sesame seeds

This tasty recipe I made is sort of a fusion of Japanese, Chinese and Korean flavors. Safe to say this is an Asian style glazed chicken dish. It may require a bit more ingredients to amp up the flavor but really, it’s quite easy to make, easy to follow through and most of what you need is easily available in your local supermarkets. But what I can absolutely guarantee is — this recipe is DELICIOUS!!! Go and try it for yourself! And let me know what you think 🙂

prep time 20 mins

cook time 30 mins

Serves 5-6 people

what you’ll need for the chicken:
  • 4 chicken breast fillet (cut into bit sizes)
  • salt and pepper (to taste)
  • garlic salt (to taste)
  • 2 tbsp paprika
  • 3 eggs (lightly beaten)
  • 4-5 tbsp cornflour or cornstarch
  • 1 cup all purpose flour
  • lots of oil for deep frying (good to use healthy oil like olive oil or canola oil)
  • chopped scallions (for garnish)
  • sesame seeds (for garnish)

In a bowl, season your chicken with salt and pepper then set aside. Next, you’ll need 3 separate bowls: 1 for the slightly beaten eggs, another for the cornflour and finally another bowl for the all-purpose flour (in this bowl add in the garlic salt, paprika, a little pepper and mix). Just set all aside.

what you’ll need for the sauce:
  • 3 cloves garlic (finely minced)
  • 1 tbsp Chinese rice vinegar or white wine vinegar (if you do not have access to both, regular vinegar can work too!)
  • 2 tbsp sesame oil
  • 5 tbsp soy sauce
  • 2 1/2 tbsp honey (best if you’re using REAL honey not the flavored one for a more healthier meal)
  • 3 tbsp tomato ketchup (not banana ketchup for all you Filipinos out there)
  • 2 tbsp brown sugar
  • 1-2 tbsp chili sauce (however spicy you want it)

Add ALL of these ingredients in a bowl and MIX! set aside as you will use this later after frying all the chicken.

time to cook!
  • Prepare your all chicken for frying: first dredge in cornflour > next dip in egg wash making sure all parts are covered > last dredge in seasoned all purpose flour
  • Heat a good amount of oil in a large pan on high heat and when you see it starts to smoke a little then you know your oil is ready for frying
  • Lower your heat a little and carefully add in your chicken. Fry until crispy golden brown. Turn 2-3 times during cooking. Good to fry in batches to ensure the chicken is fully cooked.
  • Place chicken in a kitchen paper towel to absorb all those oil. Set aside.
  • SAUCE time! get a new clean pan. Add your prepared sauce, let it simmer and reduce for about 3 minutes. Once it bubbles and consistency becomes thick, add in all your crispy chicken and coat them all with your flavorful sauce
  • Finally sprinkle with chopped scallions and sesame seeds. You may eat as is or better, top it on a big steamy bowl of white rice. ENJOY!
Posted in Mexican recipes

Crazy yummy Nachos

quick back story of why I made this dish

My brother and sister-in-law came to visit one Sunday and we had Kare-Kare (Filipino dish made with peanut sauce) prepared by my mum for family lunch. I thought wait, why not make an after lunch snack while we all sit and talk about random life stuff? And so I did just that! Bonding with family becomes extra special with food shared on the table. This literally took me less than 30 minutes to make! So easy to make (because the ingredients are mostly ready made), great for picka picka and extremely delicious! (because who doesn’t love nachos?)

This Nachos recipe is simple and ingredients are not overly complicated. You know when you see pictures of nacho recipes with 85 ingredients on top! Yes it’s yummy but THIS recipe has just the fundamentals of a delicious nachos recipe without breaking the budget and overwhelming your taste buds.

What you need for this yummy goodness:

for the ground beef:

  • half kilo lean ground beef (I used Australian ground beef)
  • salt and pepper (to taste)
  • 2 tbsp olive oil
  • 1 Taco ready mix seasoning (Chili con carne ready mix is also a good alternative, it already has spice to it)
  • 1 1/2 tbsp brown sugar
  • 1 white onion (finely minced)

For the rest of the ingredients:

  • 1 bag Nacho chips (or as much as you waaaant! yes!)
  • 1 cup pitted black olives
  • 2-3 large tomatoes (diced)
  • 1 cup pickled hot & sweet jalapeños (add more if you like your nachos spicy)
  • 2-3 cups shredded monterey jack or cheddar cheese (but really we want a bag of cheese, right?)
  • cilantro leaves (optional but really good if you add this)
  • sour cream (to slather all over…yum!)

Time to put them all together!

  1. Heat oil in a pan and add ground beef. While its starting to cook and sizzle, add in a dash of salt and pepper to taste.
  2. add 1 pack taco seasoning and mix well. Add the brown sugar and finely chopped white onions. Cook well and set aside.
  3. Arrange nacho chips at bottom of a large (microwaveable) glass serving dish, top with cheddar cheese, olives all over, jalapeños and diced tomatoes. Repeat for another 2-3 rounds until serving dish is full.
  4. Preheat oven to 400°F and bake for 12-15 minutes or until you see the cheese has melted (omg!)
  5. Carefully take it out of the oven and top it off with some sour cream and sprinkle with cilantro. Everyone dig in! 🙂

Posted in Asian Recipes

Quick and Easy Tenderloin slices with broccoli

This super yummy all-time favorite recipe takes less than 20 minutes to make!

What you will need:

  • half kilo Beef or Pork Tenderloin (cut in slices)
  • 4 cups broccoli florets
  • 1 tbsp cornstarch (mix with 4 tbsp of water)
  • cooking oil (whichever oil you prefer – I use olive oil)
  • 1 medium size clove garlic (minced)
  • 1 tbsp butter
  • 1 tbsp soy sauce
  • 1 tbsp sesame oil
  • 3 tbsp oyster sauce
  • half cup water
  • half tbsp grated ginger
  • 1 1/2 tbsp brown sugar
  • sesame seeds (for sprinkle)

how to cook it:

  1. Season tenderloin slices with a dash of salt and pepper (set aside and let it absorb the flavor)
  2. Bring a large pot of salted water to a boil. Add the broccoli florets and blanch for about 2 mins to retain crispiness. Remove from pot, run through/plunge it with cold water and drain. (set aside)
  3. In a small bowl, mix 1 tbsp of cornstarch and 4 tbsp of water (set aside)
  4. In a non stick pan, heat about 3 tbsp of oil and cook tenderloin for about 5 mins (set aside – we’ll cook it more later, don’t worry)
  5. In the same pan, add a bit more oil then fry garlic and get it to light brown until fragrant. Add in grated ginger then throw in the butter to stop the garlic from cooking further (burnt garlic is bitter and we don’t want that!)
  6. put back your semi-cooked tenderloin and mix mix mix!
  7. Time to add the flavors in! add in oyster sauce, soy sauce, water, brown sugar and the cornstarch you prepared earlier (make sure to mix the bowl again as cornstarch may have settled). Give it a good MIX! you’ll notice the sauce getting thicker.
  8. Throw in your sliced white onions, broccoli and sprinkle with some sesame seeds
  9. Roughly mix and when you see that the onions have separated, it’s ready to serve! (even better if you top it on a hot bowl of rice!)